3 good reasons to sow your seeds
1. IT WILL SAVE YOU MONEY
Buying seeds is much cheaper than purchasing plants. A packet of seeds will cost you around $3 for common fruits, vegetables and herbs, and up to $7 for varieties that are more rare. A single plant will cost the same, but seed packets contain hundreds of seeds, which you can use in subsequent seasons if they’re kept cool.
2. IT GETS THE FAMILY INVOLVED
The kids will have a great time taking care of the seedlings, just as much as the grown-ups. They can lend a helping hand when it comes to planting, as well as with daily watering. You can also exchange seedlings with friends and family, who can then plant peppers and tomatoes in their own gardens that you’ve grown in the spring.
“This is the perfect escape for when you’re
dreaming of summer on a cold day!”
- Marisol
3. IT SUPPORTS LOCAL PRODUCERS
Seed companies offer a wider variety of seeds than can be found in more mature plants. You’ll get the opportunity to find more organic products, ancestral varieties of fruits and vegetables, and also discover something new. Gardening centres often sell seeds from large American producers as well as more generic products. It’s therefore much more beneficial to support local seed companies like Jardins de l’écoumène, Semences du Portage or La société des plantes, which sell their seeds online or at their nurseries.
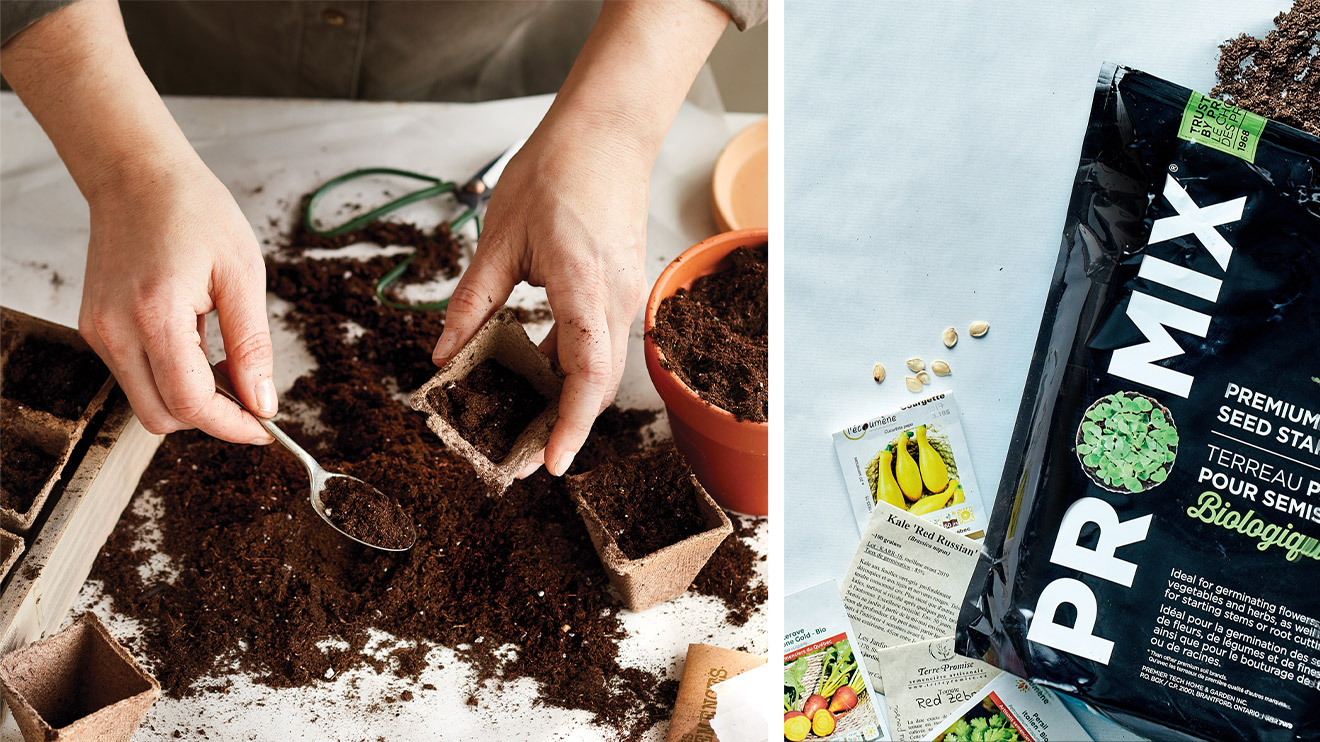
The first year of seed starting, you’ll need to equip yourself with the necessary material for planting seeds indoors.
This is what you’ll need:
- • Seed packets
- • Organic seedling soil
- • Seedling tray without drainage holes
(if you don’t have one, a large dish will suffice.) - • Containers with drainage holes
(e.g., trays, egg cartons, small yogurt containers) - • Clear dome or plastic film to cover the trays
- • Pencils and labels
- • Sprayer and watering can with rain nozzle
When should you sow?
Our planet is divided into what are known as hardiness zones, based on the climate where one lives. The timing to start seedlings varies depending on the ground frosts in your area. Some vegetables (cabbage, turnips, radishes) can withstand the cold better, whereas others are less receptive to it (tomatoes, cucumbers, lettuce). There are various calendars available online to determine the best time for your region, or even better, simply ask a specialist at your nearby gardening centre or seed company when you should get started on your seedlings.
Preparing your seedlings in 6 steps
Start your seedlings indoors for plant varieties that don’t tolerate the cold well. More hardy fruits and veggies can be planted in the ground fairly early in the season.
1. MOISTEN THE SOIL IN A BOWL
Without saturating it, press the soil in your hands (water shouldn’t drip out). Use organic seedling soil rather than regular garden soil, as the latter isn’t aerated enough to allow the small roots to form properly.
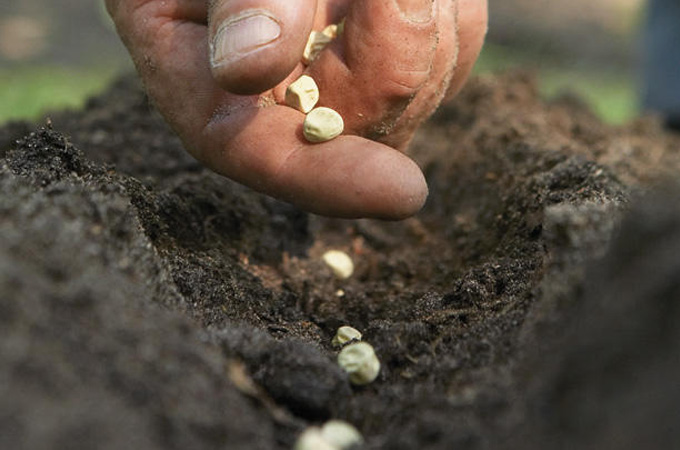
2. PLANT THE SEEDS
Place small containers or trays, perforated on the bottom, on a large tray. Fill them with soil and lightly compact it. Leave about 0.40 in / 1 cm of space from the edge. The soil shouldn’t be too compact, to ensure it dries quickly and the plant grows properly. Sow the seeds at the depth indicated on their packet, usually about three times their size. The seeds should also be spaced apart from each other. Lightly cover them with soil, and then immediately label the seedlings to avoid any confusion. Always plant more seeds than you actually need, given that some plants may not survive.
3. SPRAY THE SEEDS
A sprayer is required to water these fragile, delicate plantlings. This ensures that the seeds remain in place in the soil and retain enough moisture to germinate.
4. PLACE THEM IN A WARM SPOT
Choose a warm location in your home, near a window, a baseboard heater, or on a heated mat. At this stage, additional light is not necessary. Place a transparent dome or plastic film over the seedlings; this will create a greenhouse effect that’s conducive to germination. When the first shoots pop out, remove the cover and move the seedlings to a light source, such as a window or a grow light. (A heat source will no longer be needed.) Regularly rotate the seedlings in the direction of the light.
5. MAINTAIN THEM DAILY
Be sure to water them when the soil is dry and becomes a pale brown. Avoid overwatering, as the roots may rot if the soil remains moist. When the shoots become large enough, use a watering can with a rain nozzle or fill the tray with water for 20 minutes and then drain.
6. TRANSPLANT THE SEEDLINGS
When the shoots have two tiny leaves, called cotyledons, the time has come to transplant them. This means replanting them in slightly larger containers so that they can continue to grow. Handle the seedlings with care, given that they are rather fragile. Place some soil in a larger pot, lightly packing it around the seedling, and then water.
All that’s left to do now is wait for the warm weather to be able to plant your seedlings outside. Gardening season is now underway, and you can afford to dream about summer.