HOMEMADE RECIPES
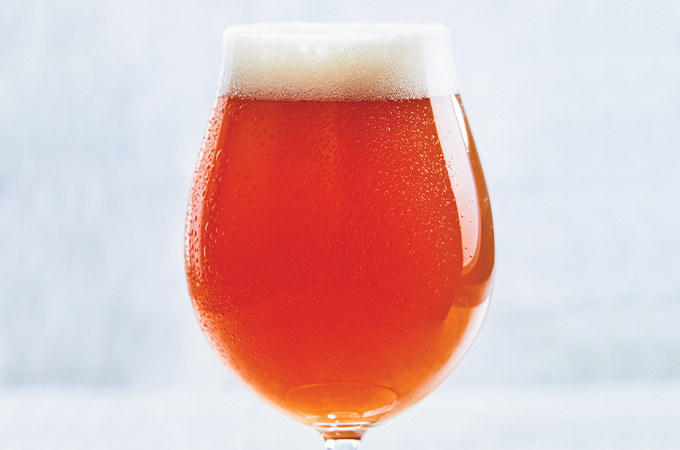
Cilantro and Orange Beer
From the materials to the ingredients, the steps to follow and the bottling, you’ll discover everything there is to know about making beer. For those who are still hesitant to embark on this type of project, we also compiled the most commonly asked questions about making beer, to better understand what you’re getting into before buying the necessary materials and ingredients! Are you ready? Welcome to the world of home-brewing!
The necessary equipment
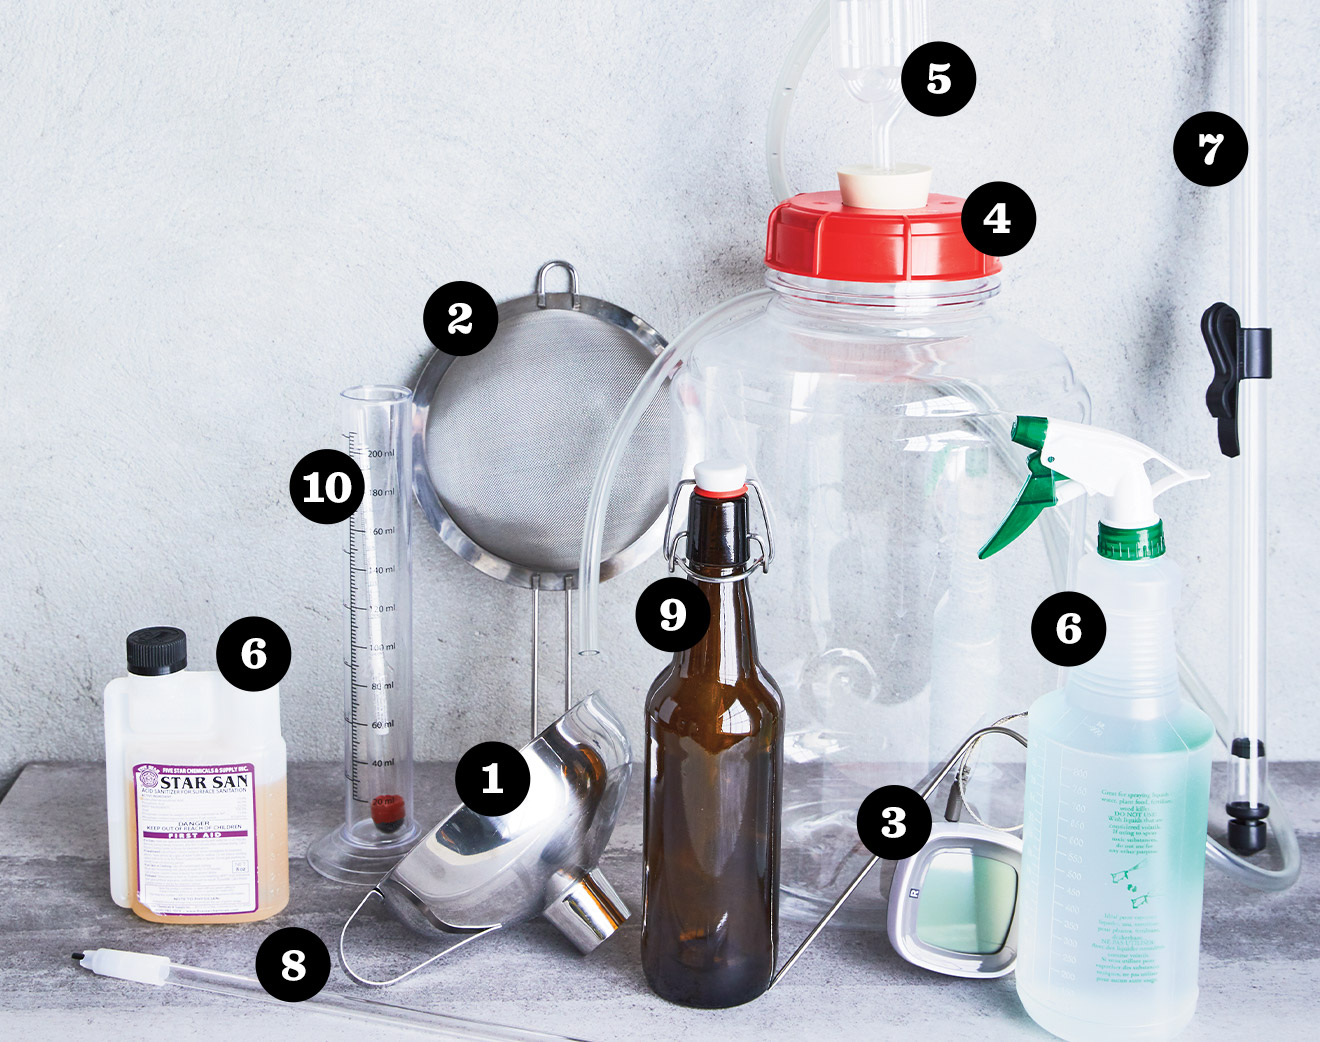
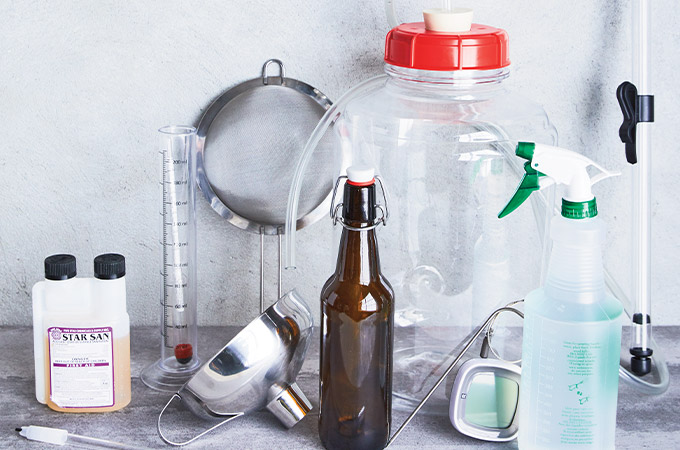
1. Funnel
We suggest using one that’s 6 inches (15 cm) in diameter.
2. Fine sieve
Have one that is at least 6 inches (15 cm) in diameter, with one or more hooks.
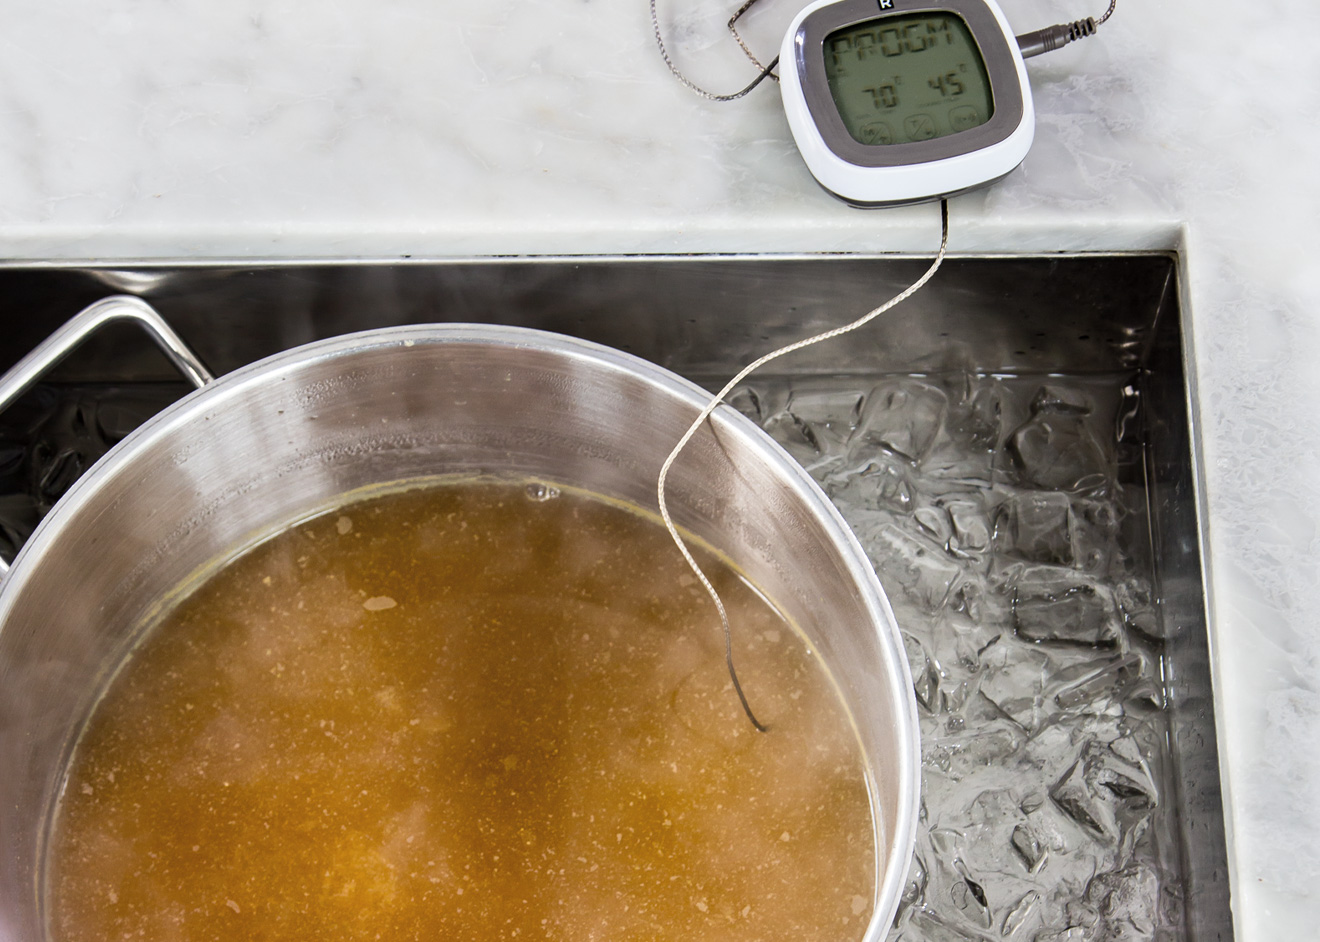
3. Probe thermometer
It will be useful for you to take the temperature of the water when cooling the wort.
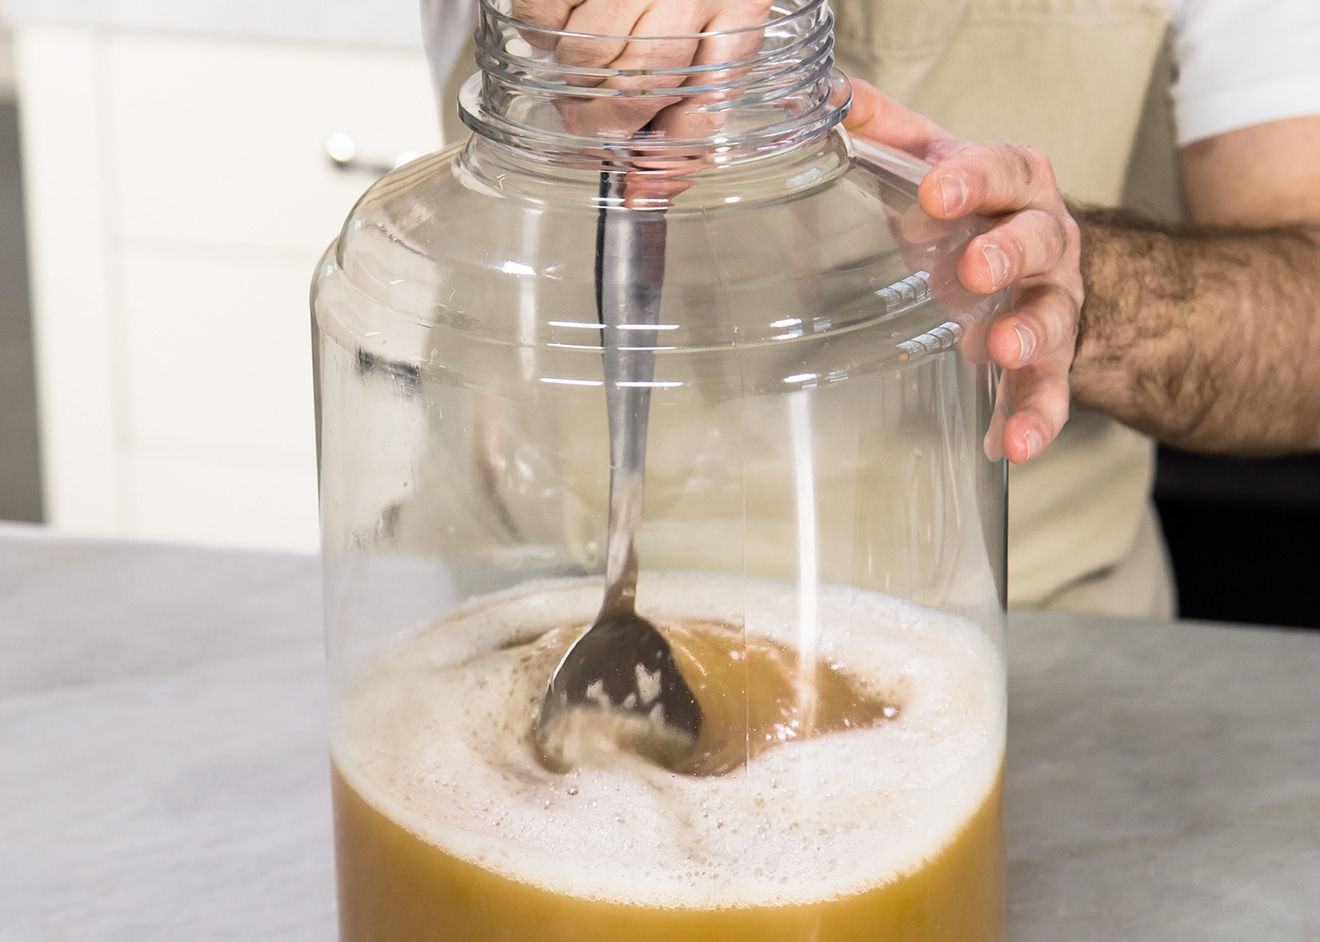
4. Fermenter
Fermentation is done in a container of at least 20 cups (5 litres) (Nicolas used the 45-cup/11.4 litre container), with a rubber cap. The brew is left there for 3 weeks.
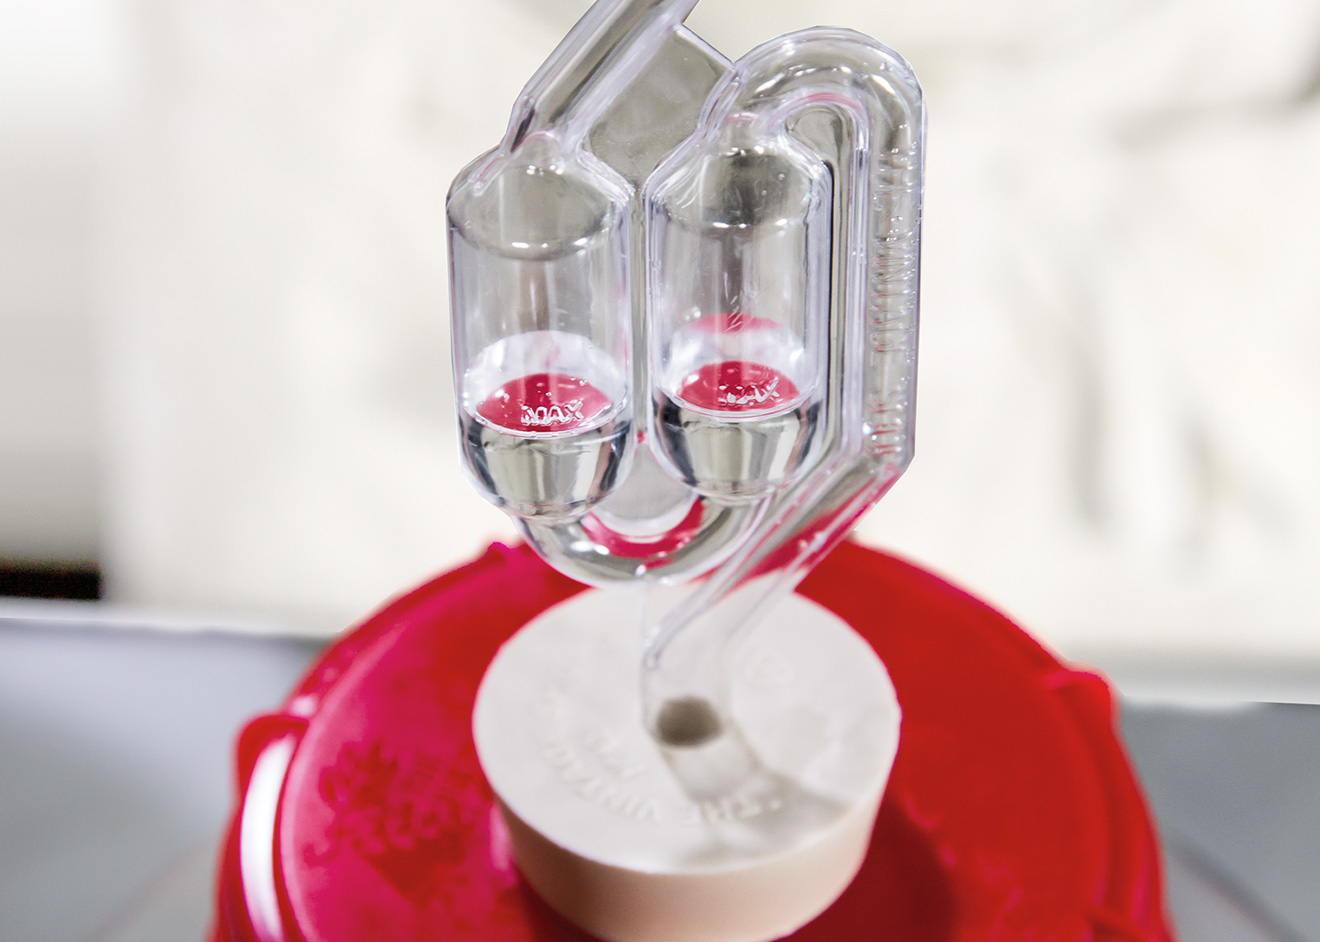
5. Bubbler
Also known as hydraulic leap, this tube allows gases that develop in the fermenter to escape while preventing air from entering.
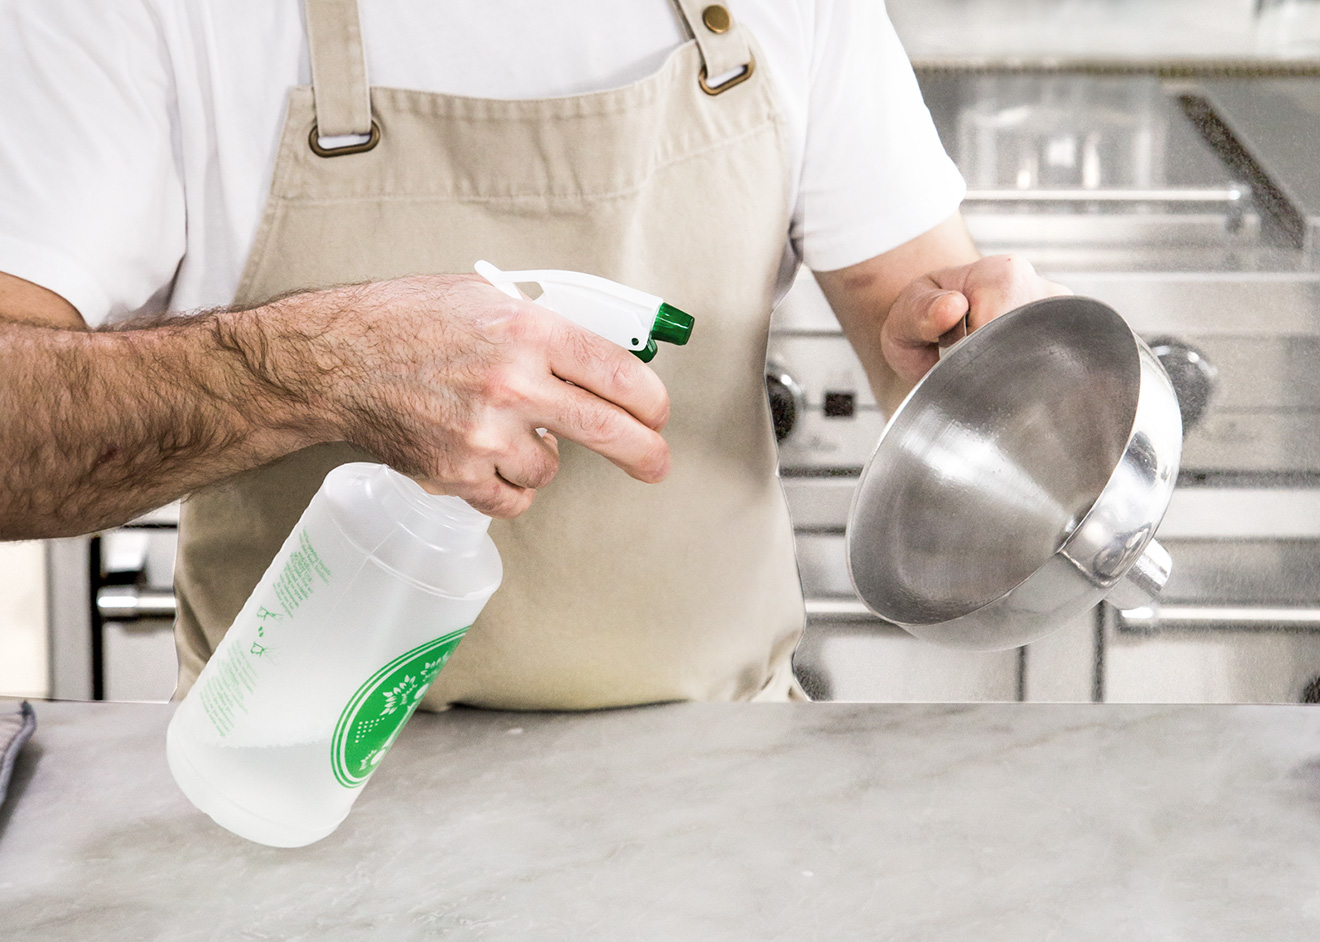
6. Star San© and vaporizer
This acidic product is professional food-grade quality and is used to sanitize instruments and prevent contamination. Aseptox is another good option.
7. Automatic siphon
This is used for beer extraction. Choose a model that is at least 16 inches (40 cm) long with a hose about 3 feet (1 metre) long.
8. Spring filler
Attached to the end of the siphon, this accessory is useful when transferring beer into bottles.
9. Bottles
You’ll need 8 for this recipe. It is recommended that you choose amber glass bottles (16 oz/500 ml) and mechanical cap. This will prevent you from having to equip yourself with a capsule.
10. Densimeter and graduated test tube
Simple and practical, this instrument can measure the density of the beer in order to calculate its alcohol content. The test tube (7 oz/200 ml) is used to take the sample.
The necessary ingredients
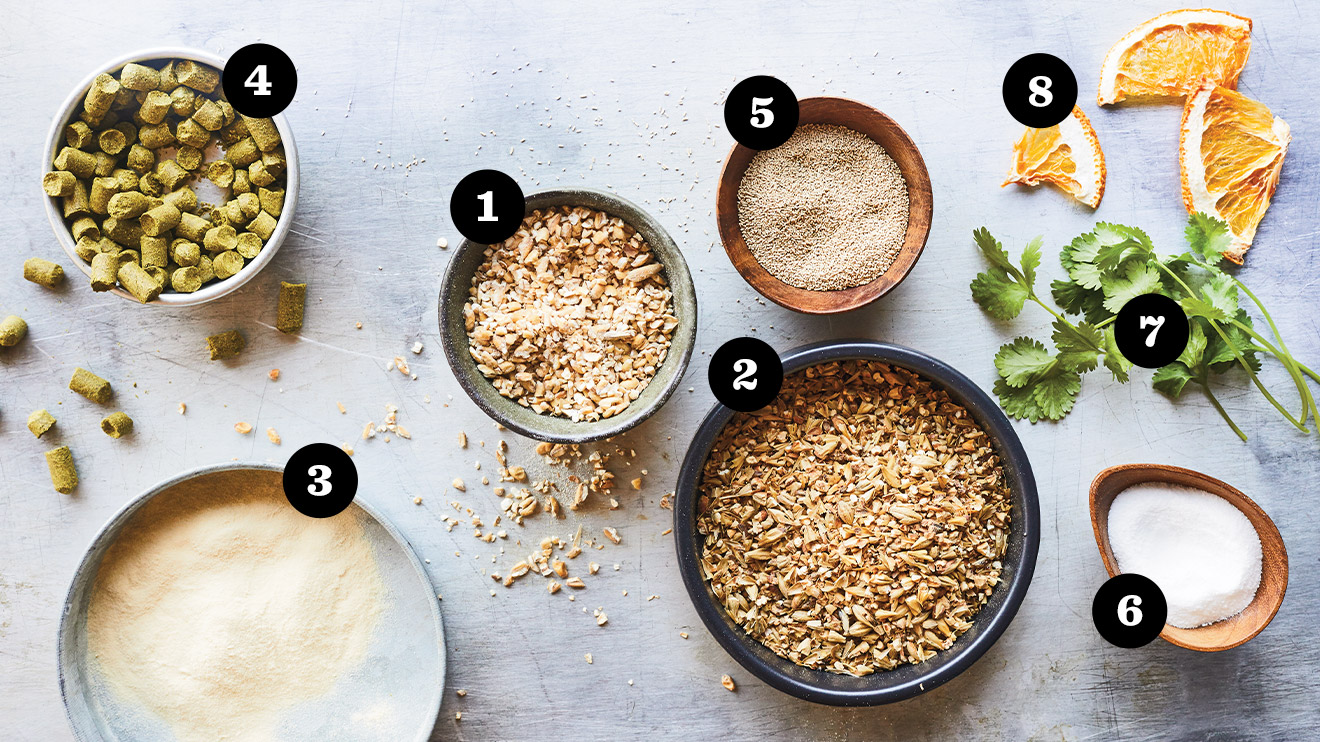
1. Crushed malted wheat grains
Malted wheat is suitable for white and session beer, and gives it a fresh bread flavour and a slight acidity.
2. Crushed Carambeer© malt grains
This specialty malt from Germany adds depth to the colour of the beer with its red highlights, and gives it pleasant notes of caramel and bread. Otherwise, use a 20 L caramel malt (Lovibond).
3. Malt extract
Available as a liquid concentrate or powder (the latter being easier to measure), malt extract also comes in several colours, which are chosen according to the type of beer to be made.
4. Simcoe hop granules
Native to the United States, these aromatic hops offer notes of apricot and pine. Citra and Galaxy hops are other options for this recipe.
5. Yeast
Lallemand Belle Saison yeast is ideal for the production of seasonal beers.
6. Dextrose
Added just before bottling, it reactivates the yeast and promotes the natural carbonation of the beer.
7. Cilantro
The stems and leaves are used to flavour this summer beer.
8. Dried orange
The dried bitter orange peels give the beer a slight fruity taste and add bitterness. Go to the next page to find out where to buy the equipment and ingredients.
The steps for preparation of the wort
1. Mashing
The crushed malt grains are soaked in hot water to extract the starch and turn it into sugar.

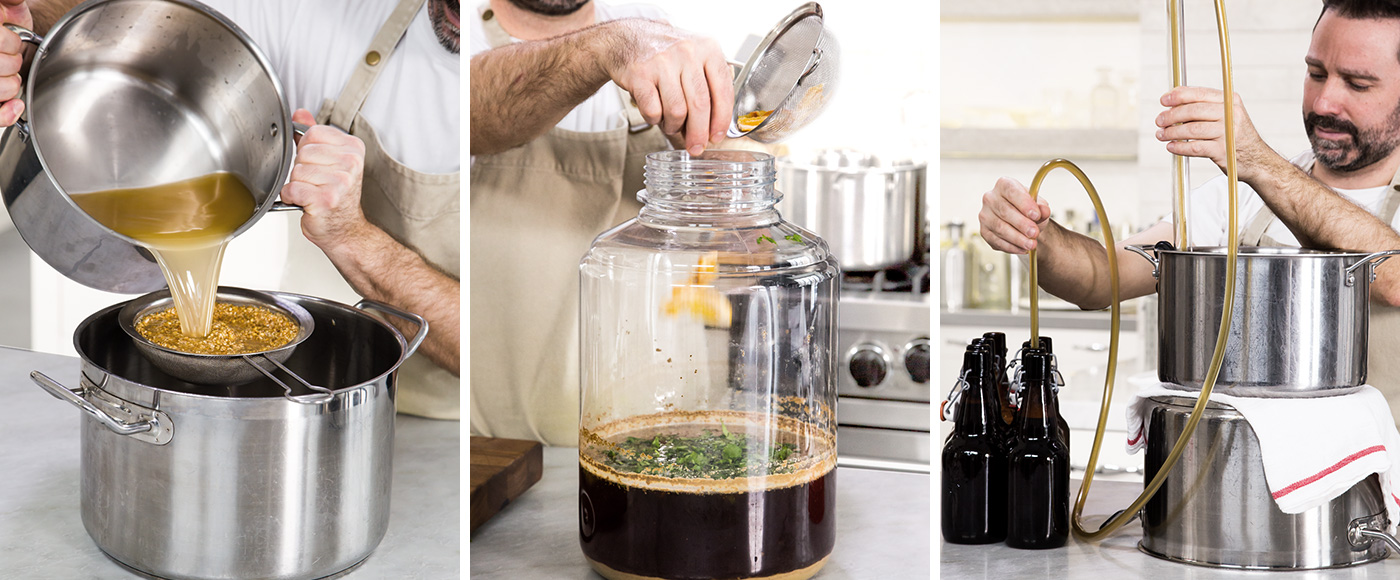
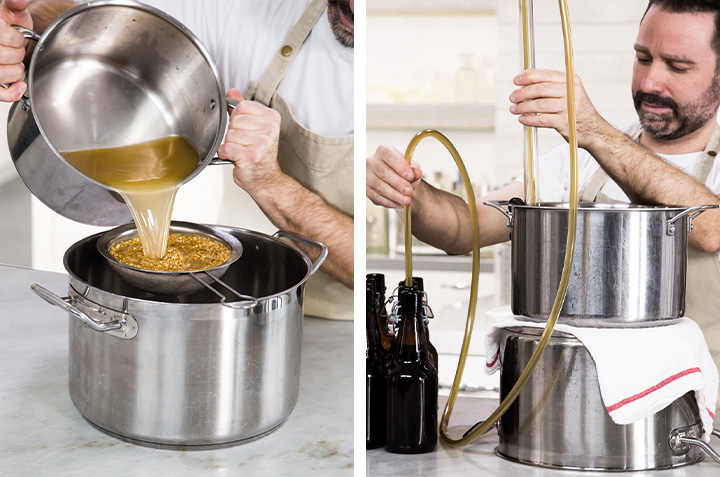
2. Filtering sequence
The infusion is filtered with a fine sieve that collects grain residues in order to recover the must. The operation is repeated by pouring the liquid through the grains each time.
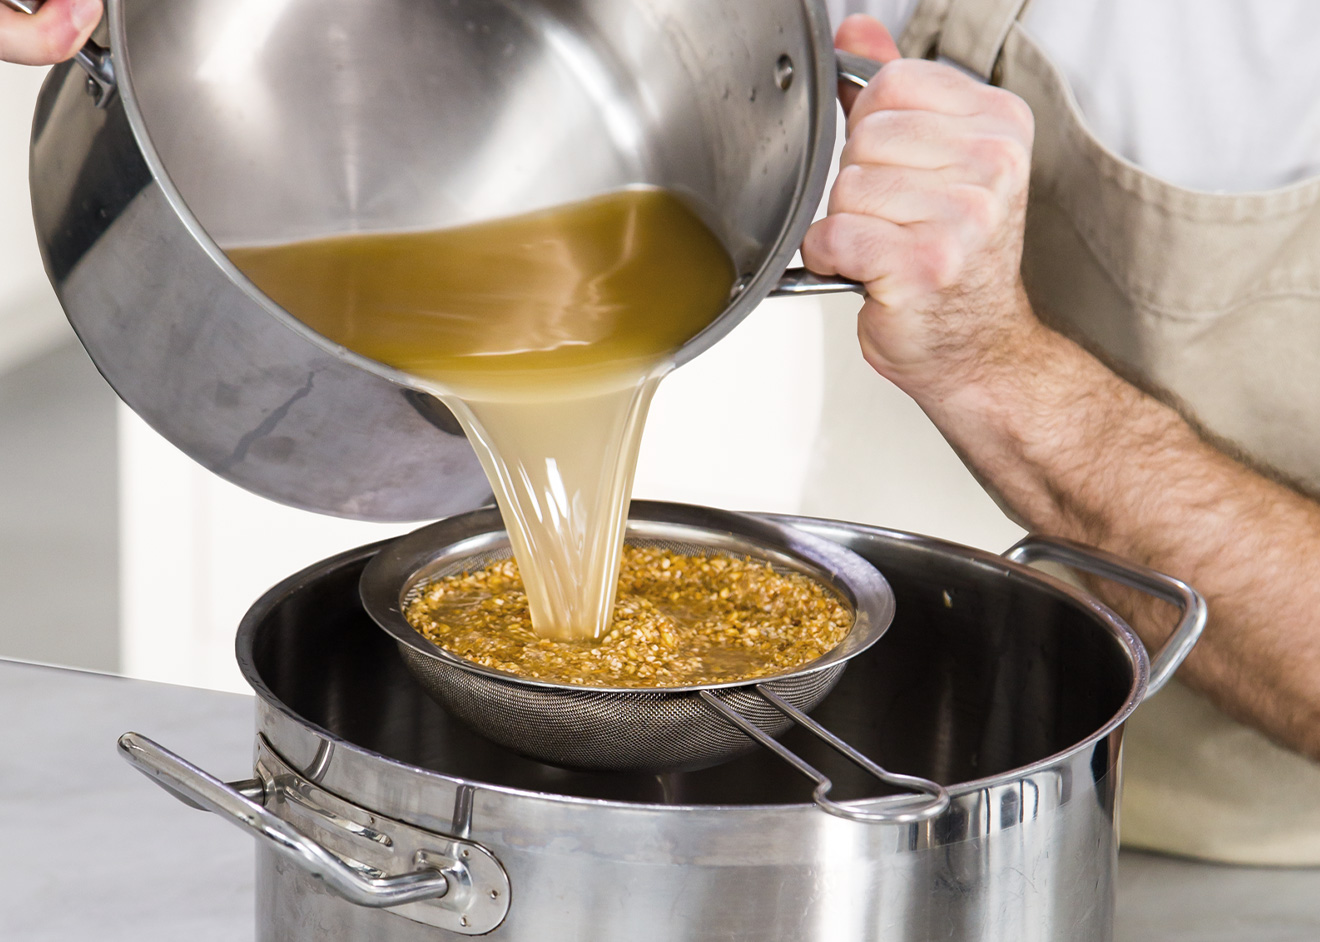
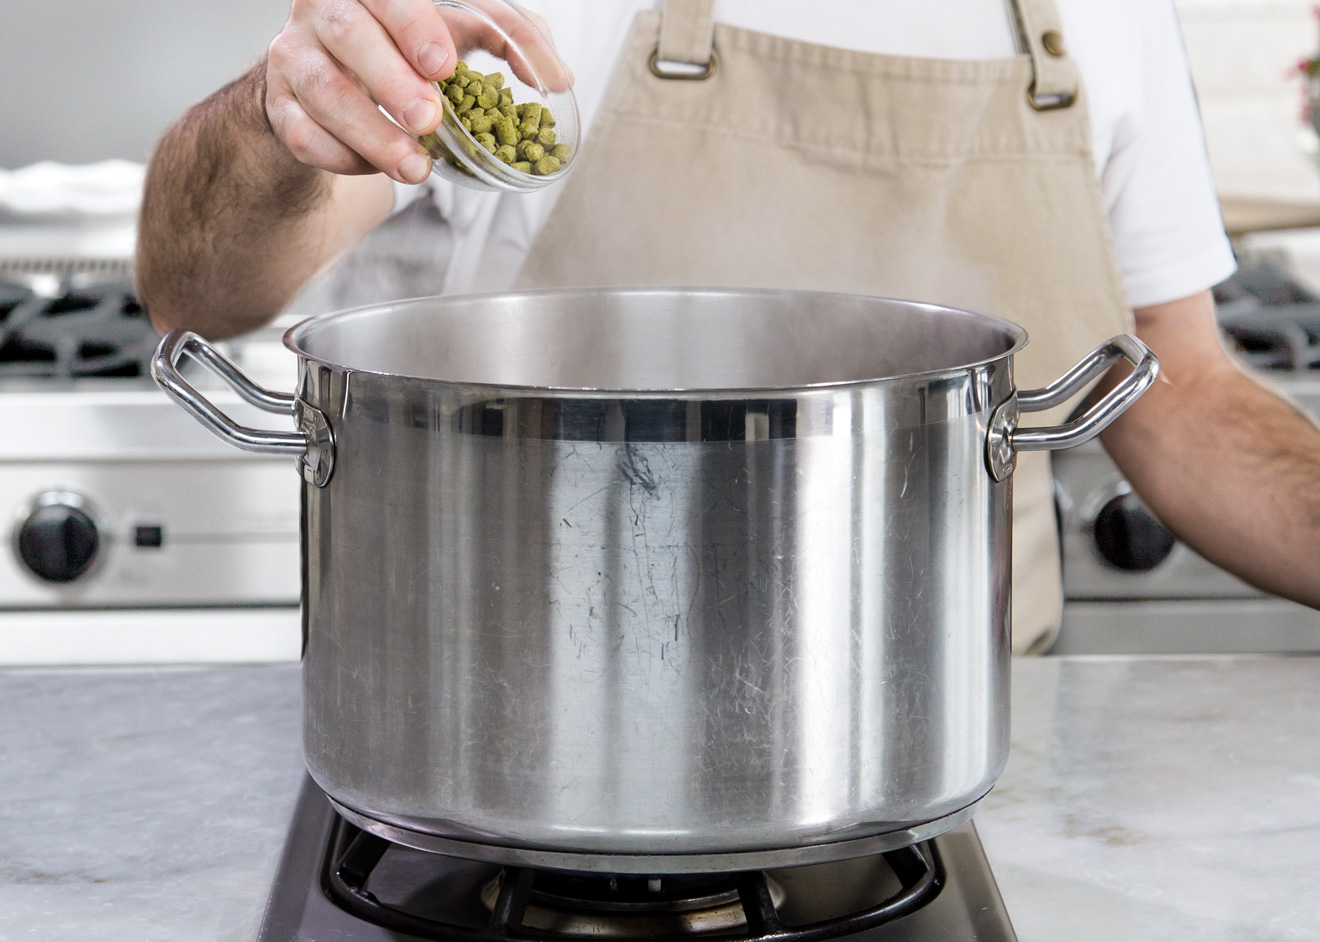
3. Cooking the must
Water and malt extract are added to the filtered must, then the mixture is boiled before the hop granules are added.
4. Sanitary precautions
From the moment the must has boiled, all instruments are washed, rinsed carefully and treated with a sanitizer.
5. Cooling the must
After cooking, the must is cooled quickly in an ice bath until the temperature reaches 68 degrees Fahrenheit (20 degrees Celsius).
6. Transfer to the fermenter
The cooled must is transferred to the fermenter, always filtering it with a sieve that is placed on top of a funnel.

7. Sowing
It is at this stage of the process that the yeast is added, which will feed on the sugars during fermentation. It is dissolved with a germ-free spoon.
8. Setting up the bubbler
This instrument, filled with water, fits into the fermenter’s cap to release carbon dioxide and prevent air from entering.
9. Adding aromatics
Orange peel and cilantro are added on the 18th day of fermentation, 3 days before bottling.

The bottling steps
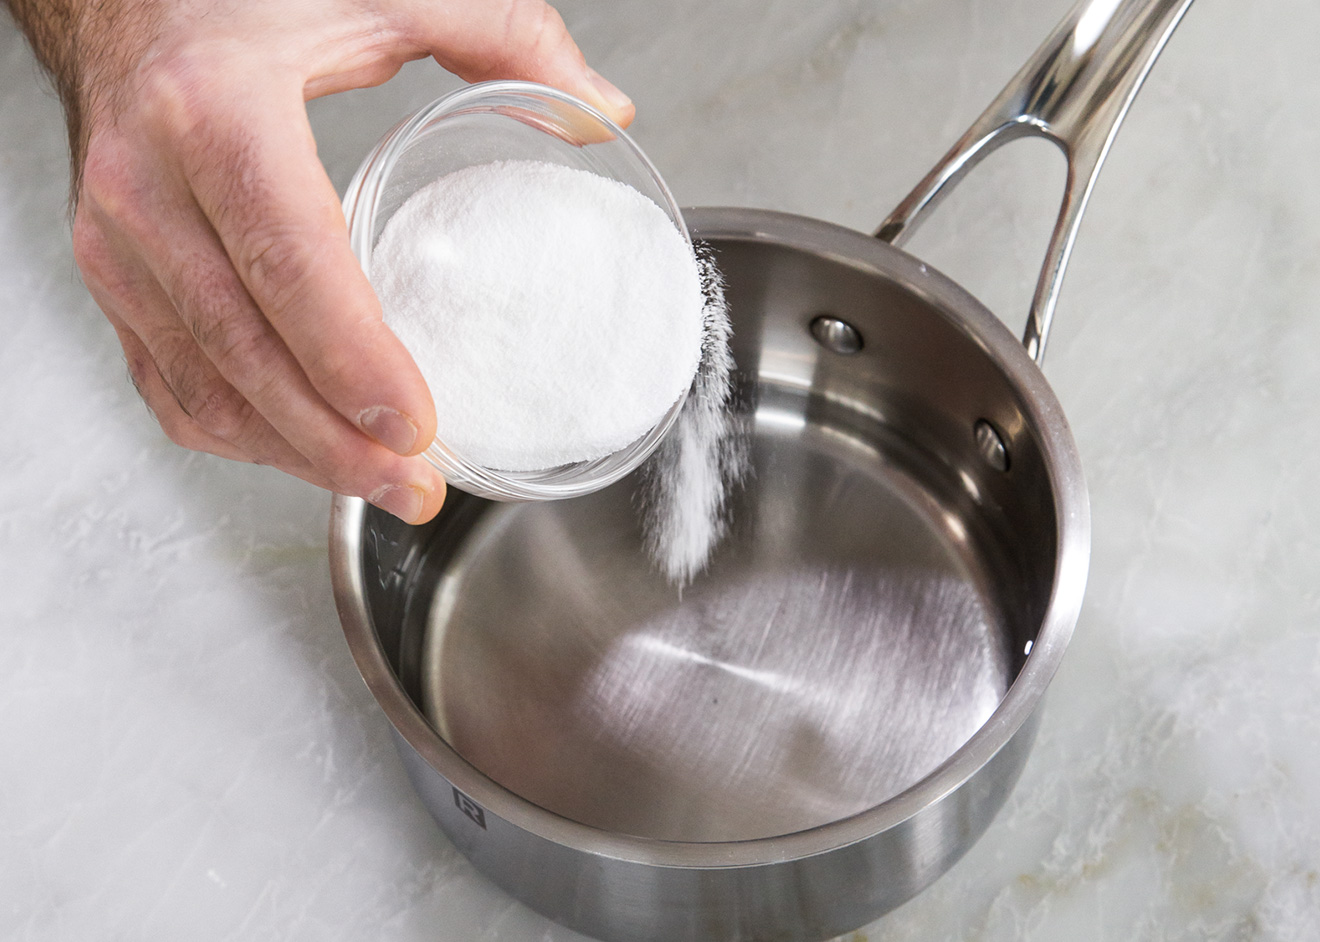
1. Preparing the syrup
Dextrose crystals, a sweetener equivalent to table sugar, are dissolved in boiling water.
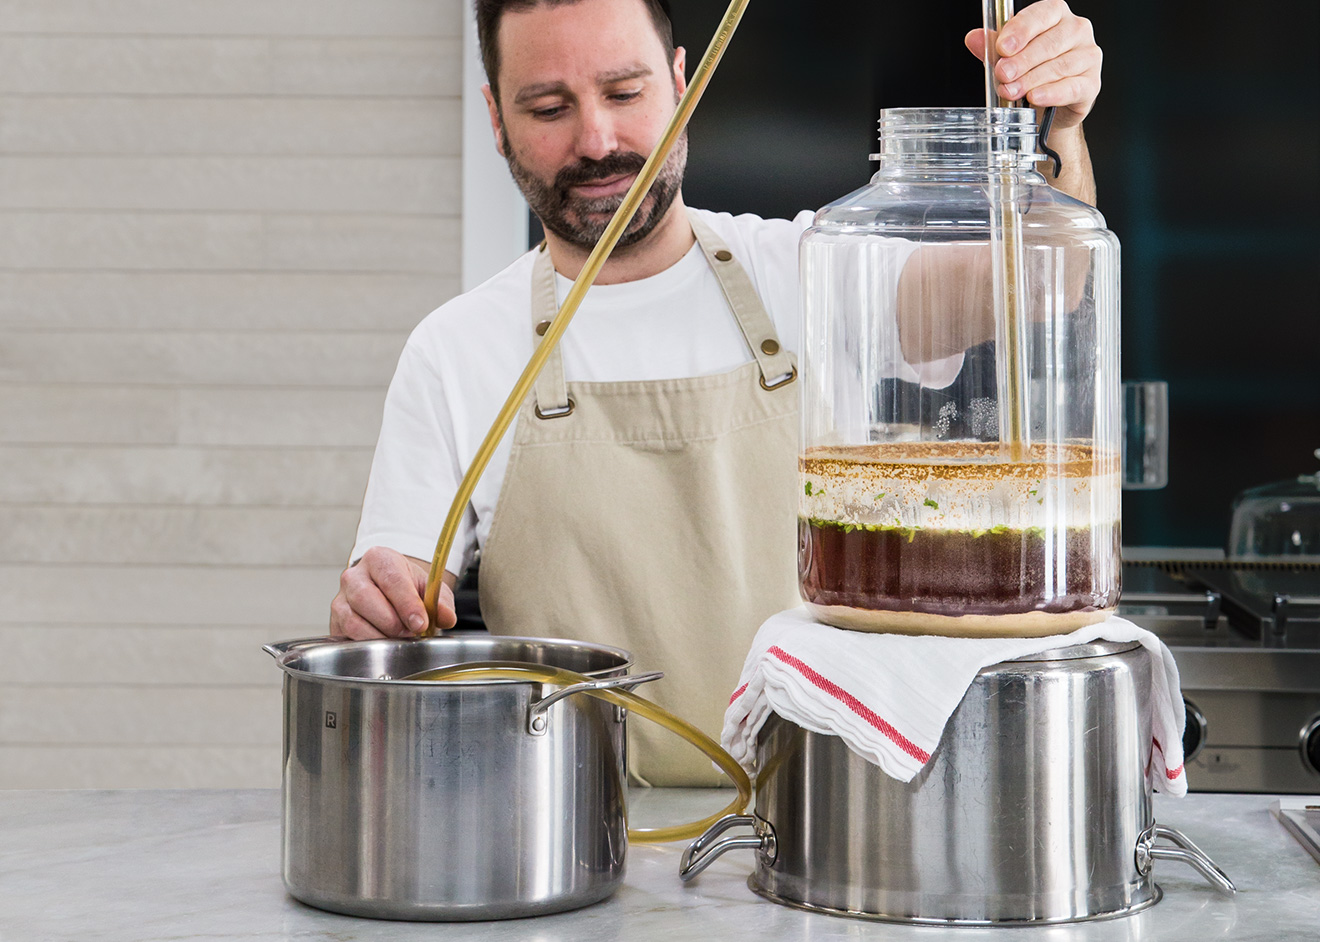
2. Tanking
The beer is removed from the fermenter by raising it. While doing so, make sure not to touch surface residues or sediments at the bottom of the container.
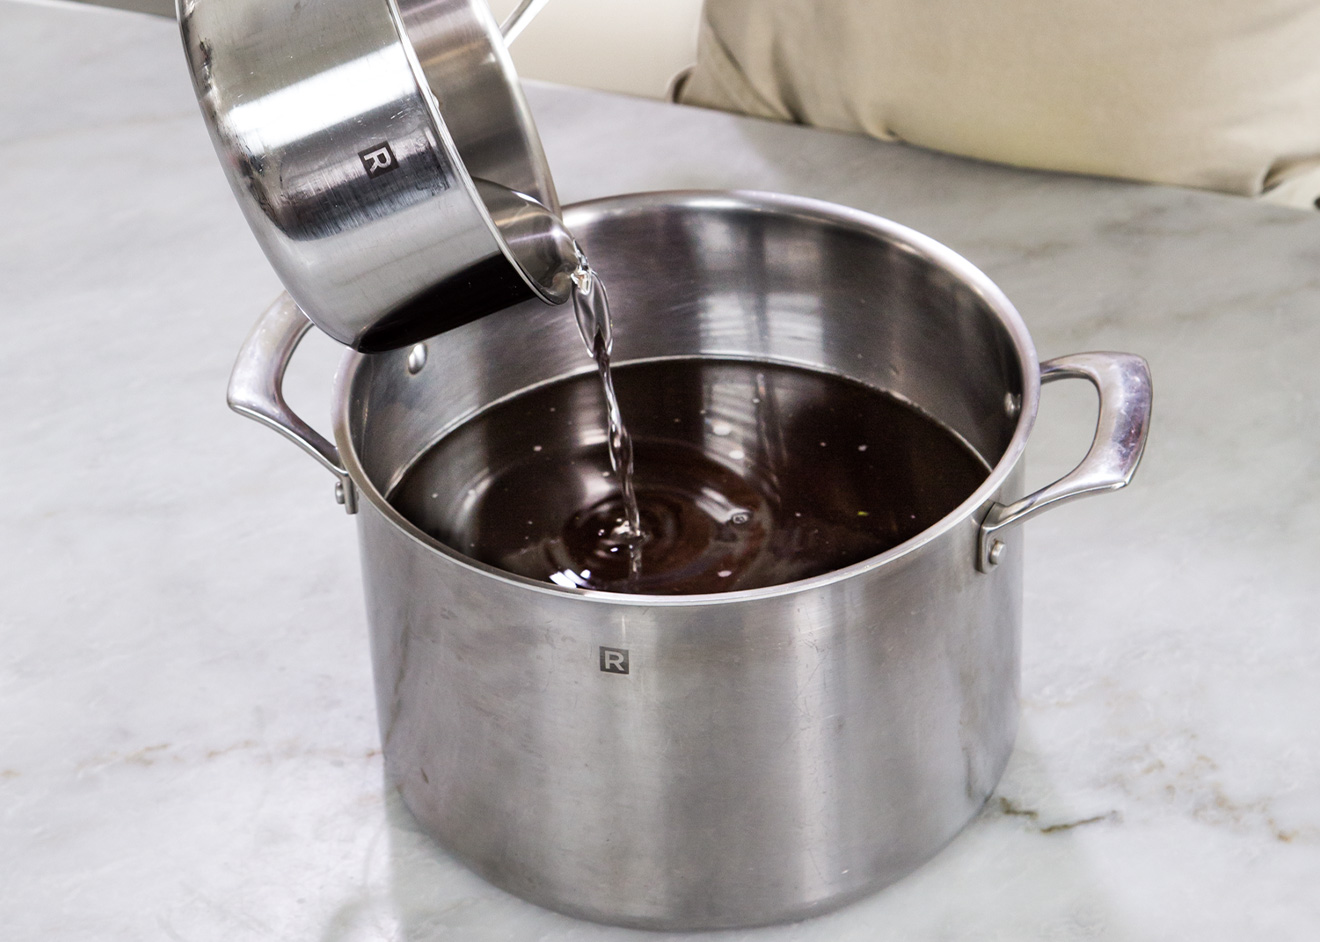
3. Adding syrup
The dextrose syrup, which is cooled during the tanking of the beer, is poured into the mixture just before bottling.
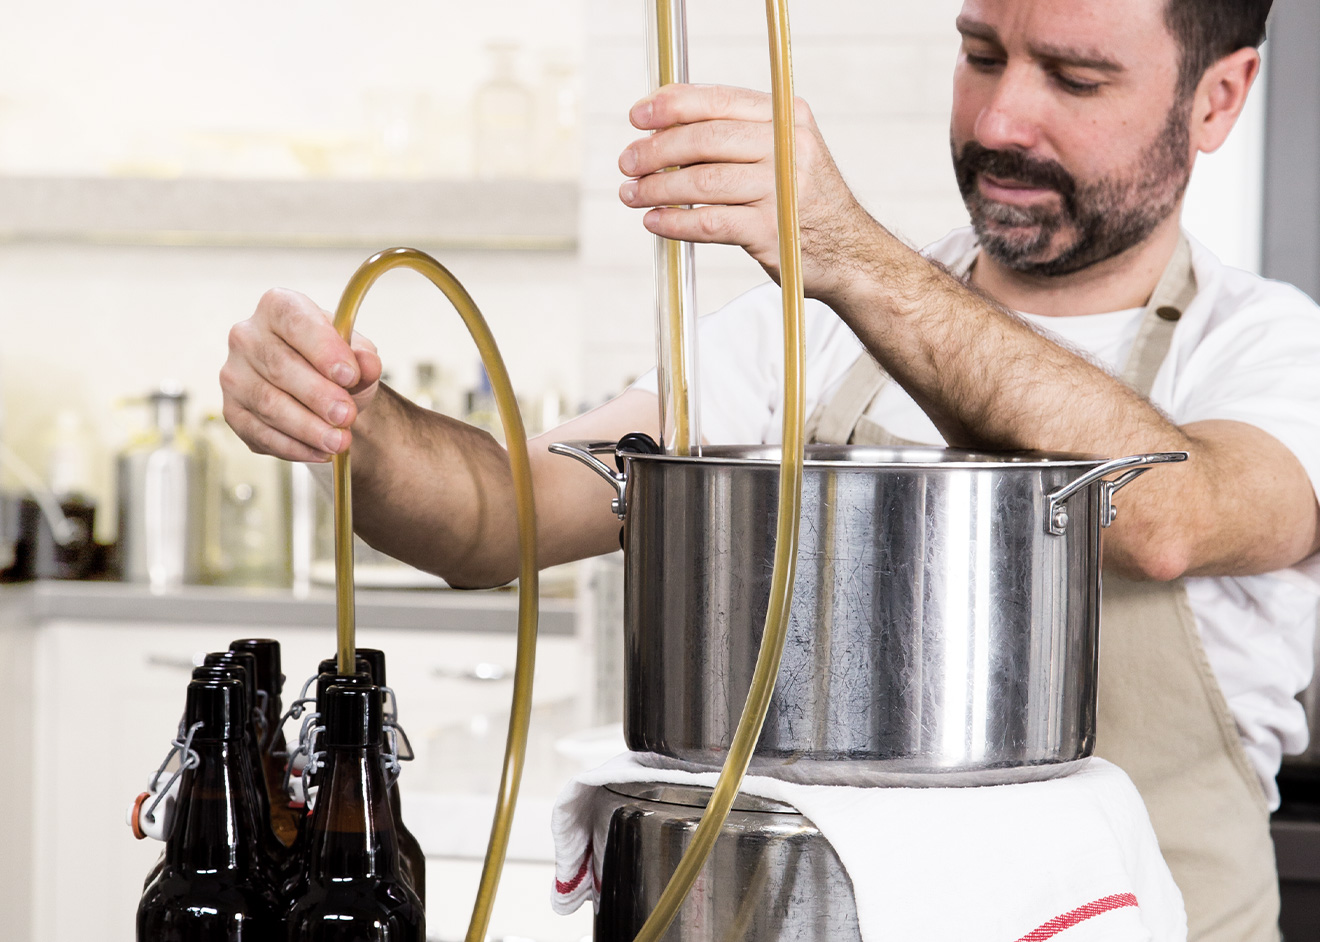
4. Filling
It’s now time to fill the bottles, which is done using an automatic siphon with a spring filler at the end.
Finally, after all this information, you’ll be ready to start your own home-brewing adventure. Bottoms up!